Some of the best DIY hamster toys are made from things you already have: toilet paper rolls, plain cardboard boxes, paper, and your hamster’s normal food. You do not need to build complicated climbing structures or buy craft supplies to make useful enrichment.
The best DIY projects give your hamster another way to do something it naturally wants to do, such as forage, chew, hide, shred, dig, or explore.
That is a better test than asking whether something looks like a “toy” to us.
What makes a good hamster toy?
Hamsters do not need toys in the same way a dog needs a ball.
Useful enrichment gives them opportunities to:
- forage for food
- dig and burrow
- chew and shred
- move through tunnels
- investigate new textures
- hide and build nests
- explore without being forced to interact
Blue Cross recommends cardboard tubes, boxes, tunnels, deep bedding, sand, and scatter feeding as ways to support these behaviors. Woodgreen similarly recommends card tunnels, cardboard boxes, coco-fibre dig boxes, cork logs, hides, and other enrichment.
That gives us a useful rule for DIY projects:
Make the hamster work, explore, or manipulate something. Do not make a decorative object just because it looks cute in the enclosure.
1. Make a toilet roll forage tube
This is probably the easiest DIY hamster toy worth making.
You need:
- one cardboard toilet paper tube
- some of your hamster’s normal dry food
- optional suitable hay or shredded paper
Put a portion of the hamster’s normal food inside the tube, add a little paper or hay around it, and let the hamster work out how to reach it.
You can lightly fold the ends inward, but do not seal the tube so tightly that the hamster has to struggle to get inside.
One important adjustment for Syrian hamsters
If the tube is narrow enough that your Syrian might try to crawl through and become stuck, cut the tube along its entire length first.
Blue Cross specifically includes this step in its small-animal tunnel instructions, and Woodgreen gives the same advice for Syrian hamsters.
That small detail makes this project much more useful than simply throwing an intact toilet roll into every hamster enclosure.
Use part of the normal food allowance
You do not need to fill the tube with extra sunflower seeds or treats every time.
Use some of the food your hamster would have eaten anyway. That turns feeding into an activity without quietly increasing the total amount of food.
Blue Cross also advises accounting for food used in enrichment rather than treating every food puzzle as bonus calories.
2. Build a cardboard hide with more than one exit
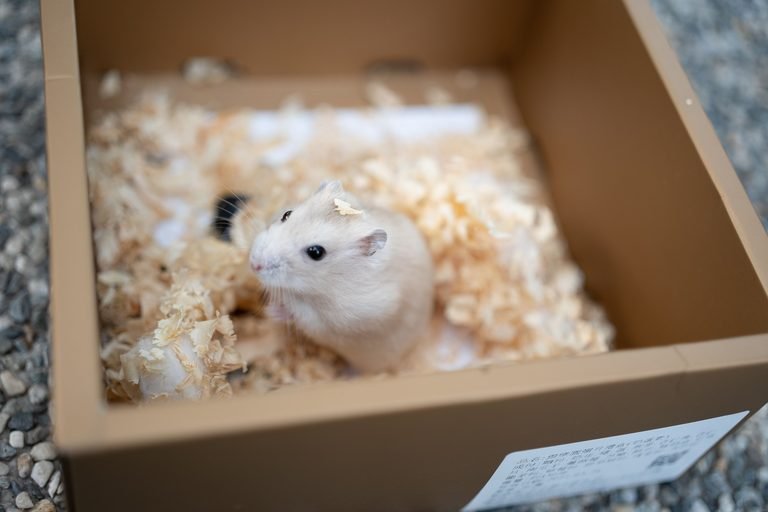
A plain cardboard box can become an excellent temporary hide.
Choose a clean box large enough for your hamster to turn around inside and remove:
- tape
- staples
- plastic windows
- loose labels
- packaging film
Cut an entrance in one side and, if the box is large enough, add another opening.
You can also cut the bottom away so the hamster can dig directly from the hide into deep bedding.
Blue Cross specifically recommends cardboard boxes as hamster hides and suggests cutting an opening in the bottom so the hamster can burrow beneath the hide.
Turn two boxes into a cardboard hotel
If one box is too simple, connect two small boxes with cardboard tubes.
Woodgreen has a DIY hamster hotel built on exactly this idea: two boxes, cardboard tubes, and appropriately sized openings.
There is no need for paint, decorative paper, or complicated glue work.
The hamster does not care whether the hotel looks good in a photo. It cares that there are dark spaces, entrances, exits, and things it can investigate.
3. Make a cardboard treat parcel
Another toilet roll can become a puzzle without being used as a tunnel.
Cut the tube into several cardboard rings. Interlock the rings around a small portion of your hamster’s normal food until you have a loose cardboard ball.
The hamster can roll, chew, and dismantle it to reach the food.
RSPCA includes a similar cardboard treat-ball design among its DIY enrichment ideas for small pets.
Keep the construction simple enough that it can fall apart when chewed. A hamster toy does not need to survive forever.
In fact, destruction is often part of the activity.
4. Make a paper nesting station
Not every DIY enrichment item needs food.
Take some plain, soft, unscented toilet tissue or suitable paper nesting material and place loose pieces in a different area of the enclosure rather than putting everything inside the nest.
Your hamster then has to collect and transport the material to wherever it wants to sleep.
Hamsters naturally manipulate and carry nesting materials, and both RSPCA and Woodgreen recommend shredded paper or suitable soft paper materials for nesting.
Do not use:
- cotton wool
- fluffy nesting fibre
- string
- yarn
- fabric strips
- materials that pull apart into long, strong fibres
RSPCA warns that strand-forming fluffy bedding can tangle around limbs, while Woodgreen also warns about pouch and entanglement risks from cotton-wool-type bedding.
5. Build a simple dig box
A dig box gives your hamster a texture different from its normal bedding.
Woodgreen specifically recommends a separate dig box or tray filled with coco coir or coco fibre as hamster enrichment.
Use a stable container that your hamster can enter easily. Add suitable coco fibre and let the hamster dig.
You can occasionally hide part of its dry food near the surface to turn the box into a foraging area as well.
Do not grab random potting soil from the garden center
The original version of this article recommended “plain potting soil,” but I would not make that a default DIY material.
Commercial potting mixes can contain fertilizers, wetting agents, pesticides, perlite, or other additives. Unless you know exactly what is in the product and that it is appropriate for hamster use, coco fibre made for animal use is the simpler choice.
The point of a DIY project is not to introduce another material you now have to investigate for safety.
6. Make food disappear into the enclosure
This might be the easiest enrichment idea in the whole guide, and technically you do not have to build anything.
Instead of placing the entire dry-food portion in a bowl, scatter some or all of it through appropriate areas of the bedding.
Hide a few pieces:
- beside a tunnel
- beneath a thin layer of bedding
- inside a cardboard tube
- around a dig box
- near a hide entrance
Blue Cross recommends scatter feeding because it encourages the hamster to search for food rather than simply eating everything from one location.
Do not bury fresh vegetables deeply where they may be forgotten and spoil.
Dry food is much easier to use for this kind of activity.
7. Make a cardboard maze, but keep it low
Several toilet rolls and cardboard boxes can be arranged into a temporary maze or exploration area.
Connect tubes through holes in cardboard boxes or simply arrange boxes and tunnels so your hamster has several routes to investigate.
RSPCA recommends cardboard boxes and tubes for environmental enrichment, while its DIY guide includes cardboard-tube mazes for small rodents.
Keep the structure low and stable.
Hamsters can climb, but that does not mean a tall DIY tower is useful enrichment. A complicated vertical craft-stick structure creates fall and construction risks without doing anything that a low tunnel system cannot do more safely.
What about egg cartons?
A clean cardboard egg carton can potentially be repurposed as another cardboard object for hiding dry food, but I would treat it as an optional material rather than one of the best DIY toys.
If you use one:
- choose plain cardboard
- make sure it is clean and dry
- remove labels
- do not use one contaminated with broken raw egg
- discard it when heavily chewed or soiled
You can place several pieces of the hamster’s normal food in different cups and loosely cover them with shredded paper.
But if you already have toilet rolls and clean cardboard boxes, those are better-supported and simpler choices.
What about popsicle sticks?
I would not put craft-stick ladders and platforms high on the recommended DIY list.
The problem is not that every popsicle stick is dangerous. The problem is that once you start building load-bearing objects, safety depends on several things:
- what wood the sticks are made from
- whether they have been dyed or treated
- which adhesive you use
- whether chewing exposes hardened glue
- whether gaps can trap feet
- whether the finished structure can collapse or tip
A cardboard forage toy failing usually means the hamster gets some shredded cardboard.
A raised wooden platform failing can mean a fall.
If you want a sturdy platform for a wheel, ceramic hide, or sand bath, a purpose-built stable platform is a better place to spend money.
DIY is useful when it solves a problem cheaply, not when it recreates safety-critical enclosure furniture.
What about terracotta pots and glass jars?
These can be useful enclosure objects, but think of them as hides and textures rather than chew toys.
A plain ceramic or glass item should be:
- stable
- free from cracks and sharp chips
- large enough that the hamster cannot become wedged
- positioned so it cannot roll or fall
- supported securely if heavy
Woodgreen recommends ceramic houses and stable platforms for heavier enclosure items.
Do not place a heavy ceramic pot loosely on top of deep bedding where the hamster may tunnel underneath it. Heavy items should be supported so burrowing cannot make them collapse.
That is a much more important safety question than whether the pot came from a pet shop or your kitchen.
DIY materials I would skip
Some household items create more uncertainty than value.
Plastic bags and plastic film
Do not use shopping bags, produce bags, cling film, or similar flexible plastic as hides.
There are plenty of cardboard alternatives, so there is no reason to introduce a material that can wrap around an animal or be chewed into thin pieces.
Cotton wool and fluffy nesting material
Skip them.
Long fibres can become tangled around limbs, and animal-welfare organizations specifically warn against cotton-wool-type hamster bedding.
String, yarn, and fabric scraps
For the same reason, I would avoid loose strings, yarn, ribbons, and fabric strips in DIY toys.
A hamster does not need them for enrichment, and cardboard or paper can provide shredding material without strong fibres.
Painted or unknown treated wood
If you do not know what a wooden household object has been coated or treated with, do not turn it into a chew toy.
You do not need to memorize a huge list of paints, varnishes, and wood preservatives. Use something with a known pet-safe purpose instead.
Random garden materials
A branch, soil, stone, or plant picked up outside introduces questions about species, pesticides, parasites, contamination, and treatment.
Natural-looking does not automatically mean safer.
For a beginner DIY project, cardboard is usually much easier to assess.
You do not need an “ink-free” rule for every cardboard toy
The original article said there should be no ink on surfaces the hamster contacts.
That is too simplistic.
Many reputable hamster-care organizations directly recommend ordinary cereal boxes, shoe boxes, toilet-roll cores, and cardboard as enrichment.
The more useful rule is to avoid cardboard that is:
- heavily coated or glossy
- wet or contaminated
- covered in tape or plastic
- strongly scented
- coated with unknown substances
Plain cardboard is still the easiest option, but a tiny amount of normal printing on an otherwise suitable cardboard box does not automatically turn it into a toxic object.
Do DIY hamster toys need glue?
Often, no.
That is another reason I prefer boxes, tubes, folded cardboard, and food puzzles. They can usually be built by cutting, folding, or slotting pieces together.
RSPCA does publish a small-rodent DIY project that uses glued cardboard tubes, so a blanket rule saying “hamsters must never contact glue” is also too absolute.
But if you can make the same toy without adhesive, that removes one variable from the project.
For a beginner guide, simpler is better.
How to check a DIY toy before putting it in the enclosure
Use this quick test.
Can the hamster get stuck?
Check every entrance, hole, tube, and gap.
This is especially important with toilet paper tubes for larger Syrian hamsters. Slitting a narrow tube lengthwise is an easy fix.
Can it fall?
Push the object gently from several directions.
If it tips easily in your hand, it may also tip when a hamster digs underneath or climbs on it.
What happens when it is destroyed?
Assume your hamster will chew it.
If the toy becomes shredded cardboard or paper, that is usually the expected outcome.
If destruction exposes wire, staples, hard plastic edges, long fibres, glue blobs, or sharp pieces, choose a different design.
Is it replacing something essential?
A DIY cardboard tunnel is enrichment.
It is not a replacement for:
- adequate enclosure space
- deep bedding
- an appropriate wheel
- hiding spaces
- suitable food
- fresh water
- a sand bath
A hamster with ten handmade toilet-roll toys but nowhere to burrow still has an inadequate setup.
That distinction matters.
Should you rotate hamster toys?
You can change disposable cardboard enrichment when it becomes destroyed, dirty, or no longer interesting, but there is no need to rearrange the entire enclosure every week just to create novelty.
Hamsters rely heavily on scent and familiar routes around their territory.
Try adding or replacing one small enrichment item at a time while leaving important resources and established hiding areas predictable.
If your hamster immediately destroys a new cardboard toy, that does not mean you failed.
For a chew-and-forage project, destroying it may be exactly what the hamster was supposed to do.
Three DIY toys I would start with
If you do not want to build everything in this guide, start here:
Foraging: a slit toilet-roll tube containing part of the normal dry-food allowance.
Hiding: a clean cardboard box with two entrances and access to deep bedding.
Digging: a stable box or tray containing suitable coco fibre.
Together, those three projects support three different behaviors instead of giving your hamster five versions of the same chew toy.
And all three can be replaced easily when worn or soiled.
The bottom line
DIY hamster enrichment can be cheap without being careless. Toilet-roll tubes, clean cardboard boxes, suitable paper, food puzzles, and a coco-fibre dig box can provide useful opportunities to forage, hide, chew, shred, and dig.
The best project is not the most complicated one. It is the one that lets your hamster perform a natural behavior without introducing unnecessary materials or risks.
Start simple. Use part of your hamster’s normal food for foraging rather than constantly adding treats. Check tubes for trapping risks, keep heavy objects properly supported, and assume anything chewable will eventually be destroyed.
Most importantly, DIY toys should add to a good enclosure, not compensate for one that lacks deep bedding, a suitable wheel, hides, or other basic needs.
Keep reading: Hamster chew toys | Complete hamster cage setup | DIY hamster bin cage
Hamster Corner provides general educational information about hamster care and enrichment. Check DIY items regularly for damage, contamination, instability, or trapping hazards and remove anything that becomes unsafe.