
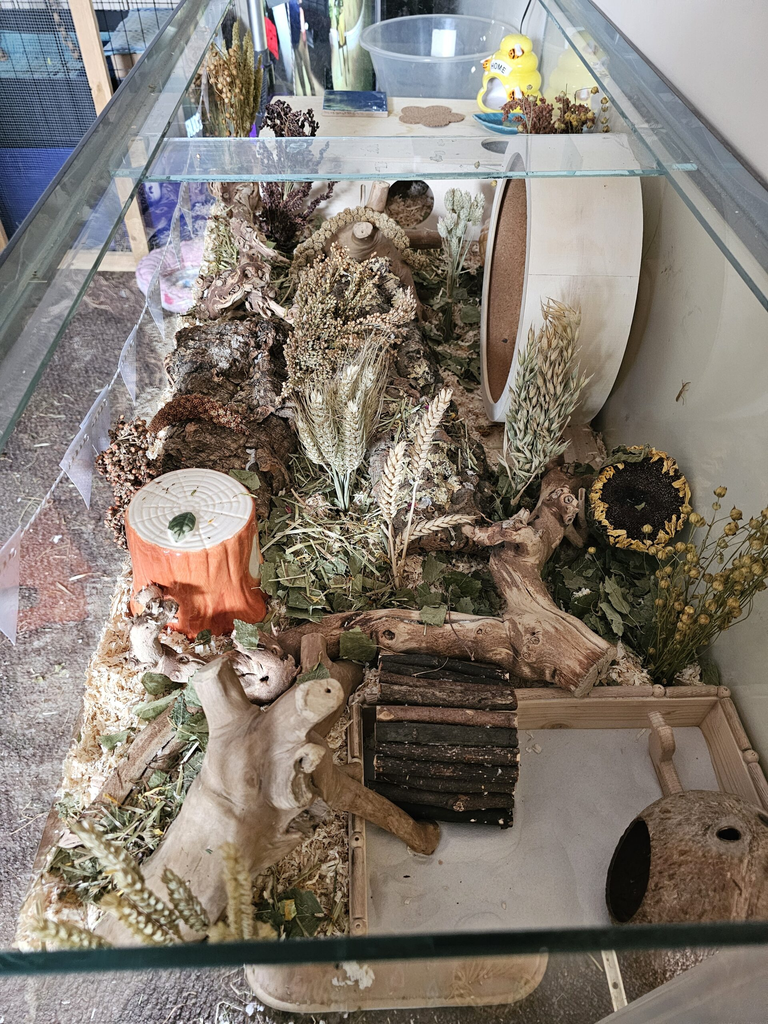
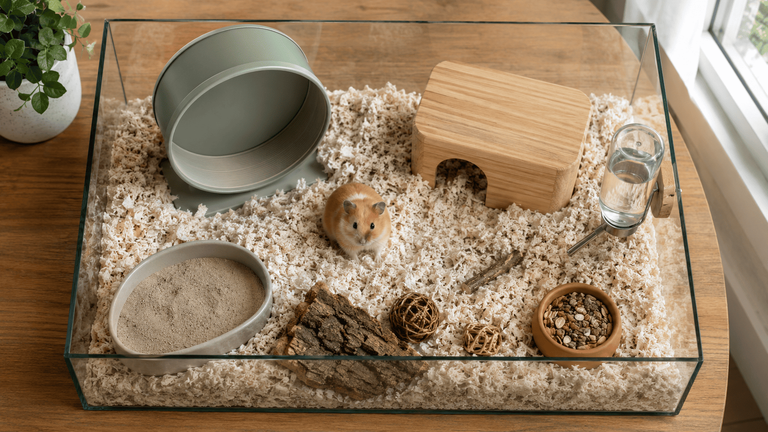
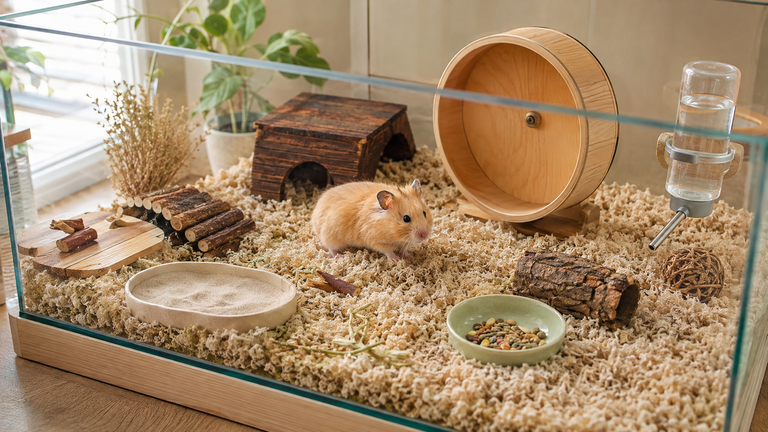
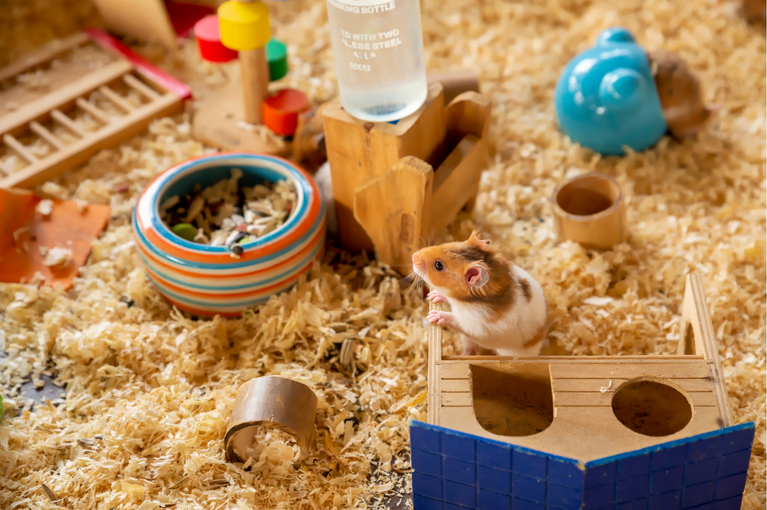
A good hamster cage setup starts with enough continuous floor space, deep bedding for burrowing, a correctly sized solid wheel, a secure sleeping hide, fresh food and water, a sand bath, and enough enrichment to let the hamster dig, forage and explore. Current Blue Cross and Woodgreen guidance uses a floor area of at least 100 × 50 cm (about 39 × 20 in) as a practical baseline for pet hamsters.
The enclosure material matters less than whether the finished setup actually meets those needs. A spacious tank can work well, but so can a properly designed barred enclosure. Build the setup around your hamster’s behavior rather than around whatever accessories happen to come with the cage.
Step 1: start with enough floor space
For most pet hamsters, 100 × 50 cm of continuous floor space is a useful current welfare baseline.
Woodgreen recommends:
- Syrian and Chinese hamsters: at least 100 × 50 × 50 cm
- Dwarf and Roborovski hamsters: at least 100 × 50 cm, with at least 40 cm of height
Blue Cross similarly recommends housing no smaller than 100 × 50 cm of floor space.
Treat that figure as a baseline, not an optimum ceiling. Larger enclosures can provide more room for deep bedding, a wheel, hides and foraging without crowding everything together.
Levels and attached pods do not compensate for an undersized main floor.
For more detail, see hamster cage size.
Does the enclosure need to be a tank?
No.
Blue Cross describes tanks and aquariums as good options because they hold deep bedding well and reduce escape through bars. The RSPCA, however, favors good ventilation and notes advantages to mesh or barred sides.
So I would not use this rule:
Barless cages are always better.
Instead, check whether the enclosure has enough floor area, holds deep bedding, has a solid floor, provides adequate ventilation and is securely escape-proof.
If you are comparing designs, see tank vs cage.
Step 2: build the enclosure around deep bedding
Burrowing is one of the most important natural behaviors a hamster should be able to perform.
Blue Cross recommends at least 20 cm of suitable digging bedding. Woodgreen recommends at least 6 inches through most of the enclosure, plus a deeper digging area of around 10 to 12 inches (25 to 30 cm).
Those recommendations are slightly different, but they point in the same direction: do not cover the floor with a thin decorative layer.
A practical setup is to provide deep bedding across a substantial part of the enclosure, then make one section even deeper where the hamster can develop larger burrows and nests.
Do not assume Syrians are the only hamsters that need burrowing depth. Dwarf and Roborovski hamsters burrow too.
See hamster bedding depth for the full setup.
Step 3: choose bedding that can support burrows
Soft paper-based bedding is one straightforward option. Woodgreen also lists aspen, hemp, cardboard material and some hay as possible components of a hamster substrate.
PetMD specifically advises avoiding cedar and unprocessed pine because their aromatic oils can irritate a hamster’s respiratory tract.
The exact substrate matters, but so does structure. Bedding that collapses immediately will not support useful tunnels.
You can mix suitable materials where needed to improve stability rather than searching for one perfect bedding product.
Avoid cotton-wool-style fluffy nesting material. Woodgreen warns that it can become tightly wrapped around limbs and may contribute to pouch prolapse or intestinal blockage.
Step 4: add the right wheel
A wheel is a core part of the setup, but size should not be reduced to one number for all hamsters.
Blue Cross currently gives these species-specific ranges:
| Hamster | Suggested wheel diameter |
|---|---|
| Syrian | 27 to 32 cm |
| Campbell’s dwarf | 22 to 25 cm |
| Winter white | 22 to 25 cm |
| Roborovski | 20 to 22 cm |
| Chinese | 25 to 27 cm |
More important than hitting one exact number is how the hamster runs.
The wheel should be large enough for the hamster to run with a straight back without raising its head, and it should have a solid running surface rather than spokes or mesh.
The RSPCA also recommends a large-diameter, solid, axle-free wheel and makes clear that a wheel should not be the hamster’s only enrichment.
See hamster wheel size for the species-specific details.
Step 5: provide a secure sleeping hide
Every hamster needs somewhere enclosed to sleep and nest.
A multi-chamber hide is an excellent option. Blue Cross specifically recommends one, while Woodgreen lists multi-chamber hides alongside plastic, ceramic and wooden houses.
It does not have to be wooden, and a single-chamber hide is not automatically unsafe.
The important points are:
- The hamster can fit comfortably.
- The inside is sheltered.
- Entrances are large enough for easy movement.
- The hide is stable.
- There are no sharp or damaged edges.
Additional hides and tunnels can provide cover elsewhere in the enclosure.
For nesting, plain soft paper is a simple choice. Avoid fluffy cotton-style nesting products.
See hamster hideouts and tunnels.
Step 6: add food and fresh water
Feed an appropriate complete hamster diet rather than building the diet from treats and fresh foods.
Woodgreen recommends scatter-feeding the hamster’s measured dry allowance around the enclosure as a way to encourage natural foraging behavior.
A bowl is not wrong, but scatter-feeding part or all of the dry ration can make feeding itself part of the enrichment.
See what hamsters can eat for the diet side of the setup.
Water bottle or bowl?
Both can work.
Blue Cross lists either a water bottle or water bowl, and Woodgreen notes that many hamsters drink successfully from bowls while bottles are also suitable.
Whichever you choose:
- Make sure the hamster can reach it easily.
- Keep it clean.
- Provide fresh water every day.
- Check bottles for leaks or blockages.
- Use a stable bowl that is difficult to tip if you choose a bowl.
Do not assume a bottle is automatically safer simply because it keeps bedding out of the water.
Step 7: include a sand bath
A sand bath is a useful part of a modern hamster setup.
Woodgreen directly recommends a sand bath using hamster-safe sand and a stable shallow container.
The container should be large enough for the hamster to use comfortably and stable enough that digging around it does not cause it to tip or collapse.
Place heavy items such as sand baths and ceramic hides on a stable platform or directly on the enclosure base before adding deep bedding. Woodgreen specifically recommends supporting heavy objects so they cannot shift onto a burrowing hamster.
For sand selection and setup, see hamster sand bath guide.
Step 8: add enrichment without filling every empty space
An enclosure should give your hamster things to do, not simply things to look at.
Useful options supported by Woodgreen include:
- Cardboard boxes
- Cardboard, wood or plastic tunnels
- Cork logs
- Branches
- Dig boxes
- Hides
- Foraging opportunities
- A sand bath
- A suitable wheel
You can also scatter the normal dry food through the bedding rather than serving every meal from a bowl.
Do not feel pressure to cover every square centimetre with accessories. Your hamster still needs usable bedding depth, routes between resources and room to explore.
I would also avoid repeatedly rotating the entire setup just to create novelty. Hamsters rely heavily on scent and established burrows, so stability has value too.
Step 9: place the enclosure somewhere suitable
Woodgreen recommends placing the enclosure:
- Away from windows and draughts
- Away from radiators and other heat sources
- Out of direct sunlight
- Away from constant loud noise
- Where cats, dogs and young unsupervised children cannot access it
The RSPCA also emphasizes a quiet, dry location, predictable lighting and protection from draughts and bright sunlight.
For temperature, Woodgreen recommends keeping the room around 18 to 21°C (64 to 70°F) throughout the year to reduce the risk of cold-induced torpor.
That is a more defensible practical target than presenting 65 to 75°F as a universal hamster safety range.
See hamster temperature guide for cold and heat concerns.
Step 10: plan for one hamster per enclosure
For a straightforward pet setup, I would plan on one hamster per enclosure.
Syrian and Chinese hamsters should live alone.
Dwarf hamster social biology is more complicated. The RSPCA notes that some dwarf hamsters can sometimes live in compatible pairs or small groups, but fighting can still develop. Woodgreen takes the more conservative pet-care position and recommends individual housing because fights in captivity can cause severe or fatal injuries.
So do not buy a second hamster because you think the first one needs a friend.
If you are considering co-housing, research the species-specific issue before setting up a shared enclosure.
Step 11: clean without repeatedly destroying the setup
The original rule to “spot-clean daily and full-clean every few weeks” was too rigid.
Woodgreen recommends daily attention to wet sand, leftover fresh food and water, with a broader refresh clean around every two to three weeks. Importantly, it also says to keep as much clean used bedding as possible.
The RSPCA gives a more flexible approach: spot-clean soiled areas every few days and says a deeper clean once or twice a month is sufficient in many setups, depending on enclosure size and toilet habits.
That variation is useful.
Clean according to what is actually dirty:
- Remove wet or heavily soiled bedding.
- Remove fresh food before it spoils.
- Clean dirty bowls, bottles and wheels.
- Preserve clean burrows and bedding where practical.
- Keep some clean familiar old substrate during larger refreshes.
Do not replace all bedding simply because a calendar says it is cleaning day.
See how to clean a hamster cage for the complete routine.
Common hamster cage setup mistakes
Buying the cage before measuring it
Product labels such as “large hamster cage” or a tank’s gallon capacity do not tell you the usable floor dimensions.
Measure first.
Using shallow bedding
A hamster cannot build meaningful burrows in a thin layer spread across the floor.
Keeping the wheel that came with the cage
Starter-kit wheels are often too small. Check the hamster’s running posture and actual wheel diameter.
Treating tubes as floor space
Attached tube systems do not compensate for an undersized enclosure. Blue Cross specifically warns that elaborate tube systems can have ventilation and accessibility problems.
Putting heavy objects on top of loose bedding
A hamster can tunnel underneath. Support heavy wheels, sand baths and ceramic hides securely.
Using fluffy nesting fiber
Use soft paper instead of cotton-wool-style nesting products.
Building a beautiful enclosure that cannot be maintained
You still need access to the water source, wheel, food stores, soiled bedding and the hamster itself if it becomes ill.
A setup should work for the animal first and photography second.
A simple setup checklist
Before your hamster moves in, check that you have:
- An enclosure with at least about 100 × 50 cm of continuous floor area
- Deep, suitable bedding with room to burrow
- A properly sized solid upright wheel
- At least one secure sleeping hide
- Safe nesting material
- Fresh water in an accessible bottle or stable bowl
- An appropriate complete hamster food
- A sand bath
- Tunnels, cover and foraging enrichment
- Stable support beneath heavy accessories
- A secure lid or doors
- A quiet location away from direct sun, draughts and heat sources
If one of the major pieces does not fit, reconsider the enclosure rather than squeezing everything into inadequate space.
The bottom line
A good hamster cage setup is built around natural behavior rather than a shopping list.
Start with enough continuous floor space, then use that room for deep bedding, a suitable wheel, secure nesting space, food and water, a sand bath and varied enrichment.
Current welfare guidance supports about 100 × 50 cm as a practical minimum footprint, but bigger setups can make it easier to provide all those resources without compromising burrowing space.
You also do not need one specific cage material, exactly 10 inches of bedding everywhere, one universal wheel diameter or a water bottle instead of a bowl.
What matters is whether the finished enclosure lets your hamster dig, hide, run, forage, sleep undisturbed and access its resources safely.
Keep reading: Hamster cage size | Hamster bedding depth | Hamster wheel size | Hamster hideouts and tunnels

[…] reading: Hamster chew toys | Complete hamster cage setup | DIY hamster bin […]
[…] feeding basics, see what hamsters can eat. For housing, see our hamster cage setup […]
[…] our hamster cage setup guide if your enclosure needs […]
[…] Keep reading: Signs of a sick hamster | Hamster cage setup […]
[…] our hamster cage setup guide for the broader enclosure […]
[…] Keep reading: Hamster sand bath guide | Do hamsters need a bath? | How to litter train a hamster | Hamster cage setup […]
[…] your hamster repeatedly chews cage bars, review the entire hamster cage setup and hamster enrichment rather than focusing only on dental […]
[…] For the rest of the habitat, see hamster cage setup. […]
[…] For the rest of the habitat, see hamster cage setup. […]
[…] For the fuller setup, see our hamster bedding depth guide and hamster cage setup guide. […]
[…] our full hamster cage setup guide before choosing an […]
[…] For the full setup, see our hamster cage setup guide. […]
[…] our hamster cage setup guide before bringing the animal […]
[…] our hamster cage setup guide before choosing an […]
[…] our hamster cage setup guide for the full […]
[…] our hamster cage setup guide before buying an […]
[…] our hamster cage setup guide before bringing the animal […]
[…] our hamster cage setup guide before buying […]
[…] our hamster cage setup guide before choosing a […]
[…] our hamster cage setup guide before choosing an […]
[…] our hamster cage setup guide and hamster setup cost guide before […]